Born again - a caravan restoration project
Lee Davey tells us how he brought a forlorn 1967 Bailey Maestro back to life
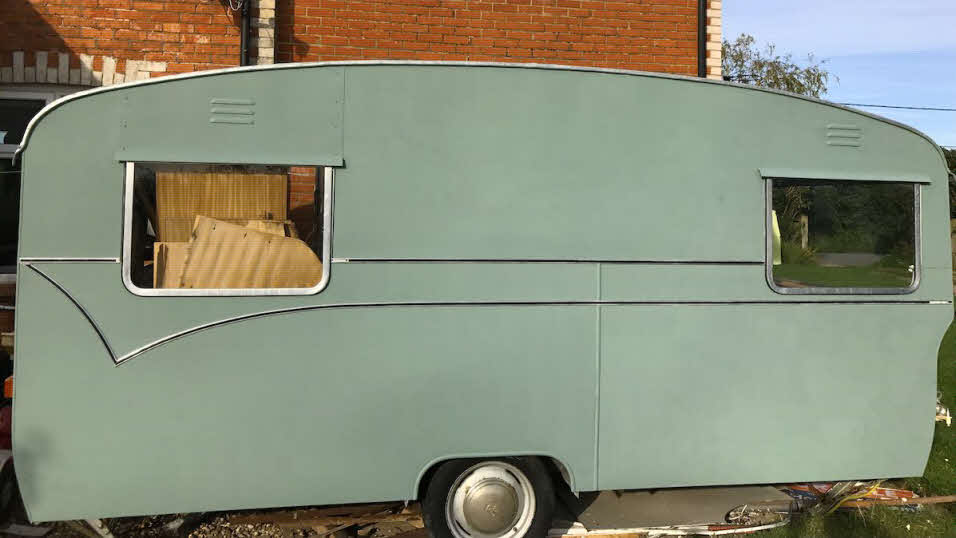
Storage yards, barns and hedgerows across the country are home to a surprising number of once-loved caravans that haven’t enjoyed a holiday in a very long time. Mother Nature may be attempting to reclaim a number of these ancient tourers, cloaking them in brambles, moss and mould – but some are just waiting to be found so they can be returned to their former glory.
Our story began with a search on eBay, where my son, Charlie, and I stumbled across a 1967 Bailey Maestro that had spent the last two decades as part of a hedge. The description and photos did little to boost our confidence, but we were drawn-in by sweeping Sixties bodywork and a desire to see how caravans had changed over the course of 50 years or so. Preparing ourselves for the worst, we clicked the bid button and kept our fingers crossed.
Be realistic
Project caravans have a nemesis: damp. Plenty are advertised as ‘dry’ but 50-year-old sealants are unlikely to have lasted, so it’s worth having realistically low expectations and accepting anything better as a bonus.
Thankfully, traditional constructions featuring aluminium sheeting over a wooden skeleton are relatively easy to work on. The main component parts that we had to consider on our vintage caravan were chassis (including hitch, brakes and wheels), floor, wooden framework, interior (including wallboard, furniture and associated equipment), outer aluminium ‘skin’ and windows.
Frame
In an ideal world, removing the skin provides access to screws that hold furniture in place against the interior wallboard. However, our ‘workshop’ was the patio and the aluminium panels had to remain in place to keep the weather out, so a hacksaw was used to cut the screws that secured the cupboards and kitchen. The soggy wallboard was removed so we could assess the extent of the damage.
All four corners were rotten and a section of the roof had fallen victim to a tree. However, the frame was remarkably similar to that of a garden shed, and rudimentary woodwork skills go a long way when working on this type of structure. The key is to work on small areas – such as a corner – at a time, as this helps the caravan retain a degree of strength and therefore its shape.
Exterior
The wooden battens behind the awning rails were removed and replaced, and with fresh woodwork in place, paint, corroded material and rock-hard sealant were painstakingly removed with a wire brush on a drill. With sparkling aluminium to both sides, a modern sealant was applied and new fixings used. Aluminium beads seal exterior joints and these received the same treatment, along with the window frames.
Chassis
Wire brushing the metal chassis rails and repainting with a hardwearing metal barrier paint was important, if not particularly pleasant, and I was able to inspect and replace any wooden rails that ran underneath, along with suspension bushes that showed signs of play.
The braking system was dismantled, inspected and reassembled, with few parts requiring more than basic servicing and maintenance. The hitch was also repainted, re-greased and checked for wear, before being treated to a new damper.
Thankfully, a lot of the suspension and braking systems of the period share components with cars of the era, meaning parts are readily accessible. The ageing tyres were also replaced.
Paintwork
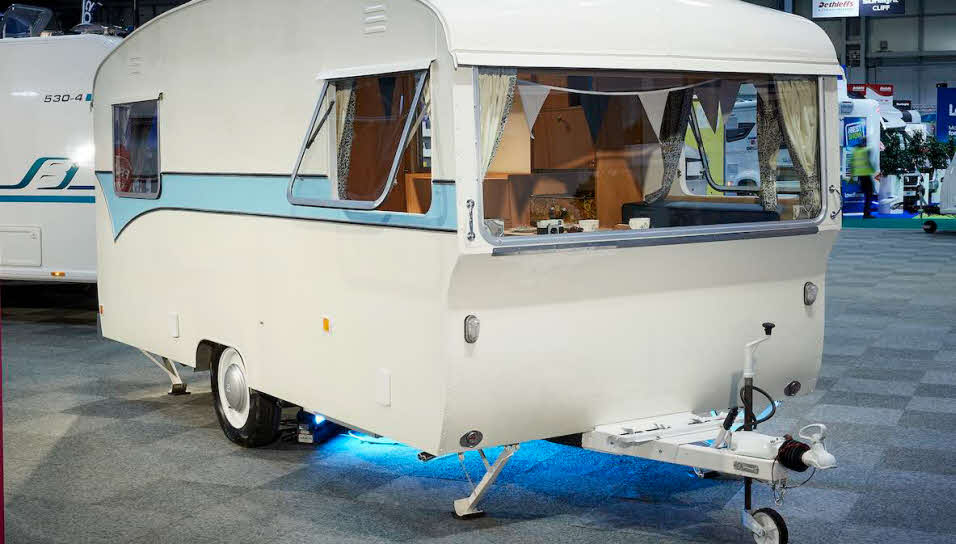
Bailey, which continues to manufacture caravans at the same Bristol site where our 1967 Maestro began its life, informed me that tourers were hand-painted in coach enamel at that time. Having a caravan sprayed can be incredibly expensive and I’m thankful that keeping things authentic actually kept costs down. All I needed was a YouTube tutorial, a gloss roller and a decent brush to ‘lay off’ the coach enamel.
We stripped layers of untidy paintwork from the body until fresh metal was found, before etch priming and priming. We practised applying the topcoat on small areas before treating 'Gladys' (as she was now called) to a complete fresh coat of enamel.
Interior
With new 3mm boards lining the ceiling and walls, and a square of lino covering the floor, the smell of mould was gradually subsiding. My sister-in-law was making new cushions and curtains which gave me time to tackle the fixtures and fittings.
The fallen tree had sadly channelled rainwater into the kitchen, which had taken its toll on this area. However, it’s possible to match original woodwork fairly well and we were able to blend new components with those that had been fitted in Bristol in the Sixties.
I thought the interior would be a quick dash to the finish but it proved to be quite a lengthy process that was hindered by a multitude of small, niggly jobs.
Heating
It’s estimated that during the Sixties one in seven Britons holidayed in a caravan, and I assume they were either a hardy bunch or chose to go away during the summer season. The factory-fitted heating equipment in our Maestro comprised a gas lamp at either end and a two-burner hob, which would have warmed the ‘van while dinner was cooking; the humble kettle was tasked with all water-heating duties.
During the restoration process, my son Charlie and I began looking at modern ways to keep warm without sacrificing the period look that attracted us to ‘Gladys’ in the first place, so we researched slimline heating systems that are small enough to be hidden in bed boxes or mounted under the floor.
Size was obviously going to be an issue, as the Maestro bed boxes are significantly smaller than the ones we’re used to in modern touring caravans. The seating/sleeping area is both low and narrow, further reducing the list of possible units, but we found a Whale underfloor heating system that fitted the bill. Sited between chassis rails, the only parts of the heating set-up you can see inside are blown-air outlets and the associated pipework that distributes heat around the caravan.
The flue snakes discreetly to the side of the tourer (away from the windows), quietly venting the exhaust fumes when used on gas. Gladys is compact in all areas, and the Whale Expanse water heater was too deep to be housed under the floor, but it nestled perfectly inside the nearside bed box.
Weight watching
Once we’d chosen our systems, we conducted a ‘dry fit’ to check weight distribution. Each item was loosely set in place (along with the Dometic compressor coolbox) and the noseweight carefully checked, to make sure our outfit would be safe and enjoyable to tow. Different placement locations were tested (with additional luggage onboard or not) before we settled on positions that suited weight distribution as well as water, gas and flue routing.
The planning process was more time consuming than installation. After we had decided where to put each unit, fixing brackets and cutting holes was a very straightforward process. Blown-air ducting simply snaked through a bed box and wardrobe, allowing us to heat either end of the caravan independently, even though overall body length is just 14ft. Control panels connect to the systems via multiplugs and are small enough to be hidden from view yet easily accessible.
Connecting gas and electricity isn’t a DIY process and should only be carried out by professionals – the repercussions of less than perfect connections do not bear thinking about. Thankfully, a couple of friends were able to pop by and help – one an electrician and the other a gas installer.
Charlie and I tackled the water system’s push-fit pipes and we decided to fit an external shower point while things were easily accessible. To date, it has only been used to wash the dog, but I have seen shower tents for sale, something which we may add in the future.
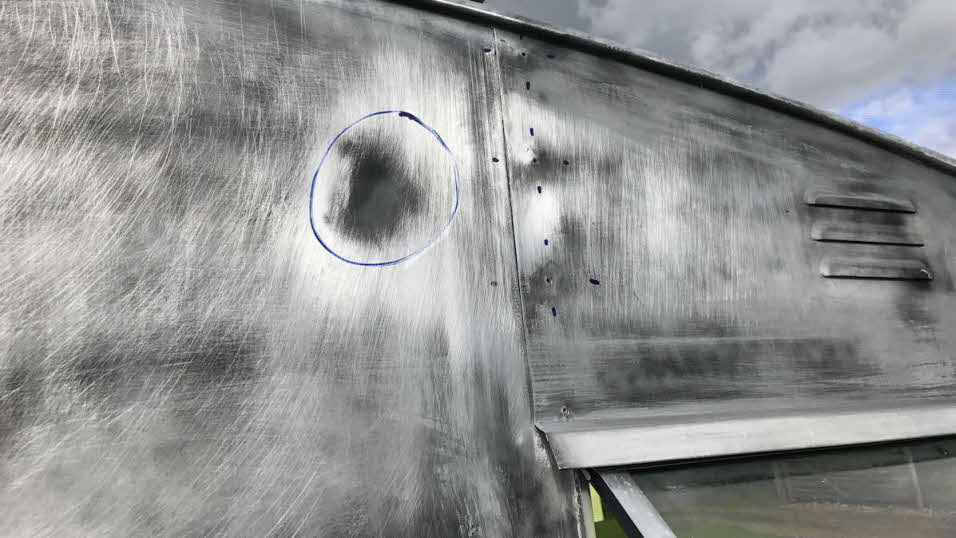
Other modern kit
Having spent two decades in a hedge before Charlie and I rescued her, Gladys was in a bad way – a tree had fallen on the roof, stretching a small section of aluminium. A flexible 100W solar panel covered this perfectly and allowed us to run an amazingly efficient Dometic compressor fridge/freezer, which is hidden in the wardrobe. LED lighting lies behind George and Mildred-style lampshades, and various USB points are tucked away. We also have a complete 240V system distributed inside via C-Line sockets from Prima Leisure.

Increased flexibility
Upgrading your current system or adding heating and hot water to a tourer that wasn’t designed to house such equipment is surprisingly straightforward. Adequate heating gives you the freedom to explore year-round and the ability to operate on gas gives you the option to go off-grid and enjoy sites away from electric hook-up cables. As a family, we can now be a bit more flexible in terms of when we go away, and where we stay.
Want to see more? Look for the 'Caravan Restoration' playlist at youtube.com/tintent.
The finished article
Time was our biggest outlay, something that we had hugely underestimated. Roofing battens proved cost-effective with 25mm x 50mm lengths cut down the middle, and new 3mm ply came via a builder’s merchant.
Such a project can appear intimidating, but split into small, bite-sized chunks, it’s a relatively straightforward and immensely satisfying process. If Charlie and I can do it, anyone can!
About the author