How to take photographs of water
David Chapman offers his expert advice on taking images of everything from tiny water droplets to spectacular seascapes
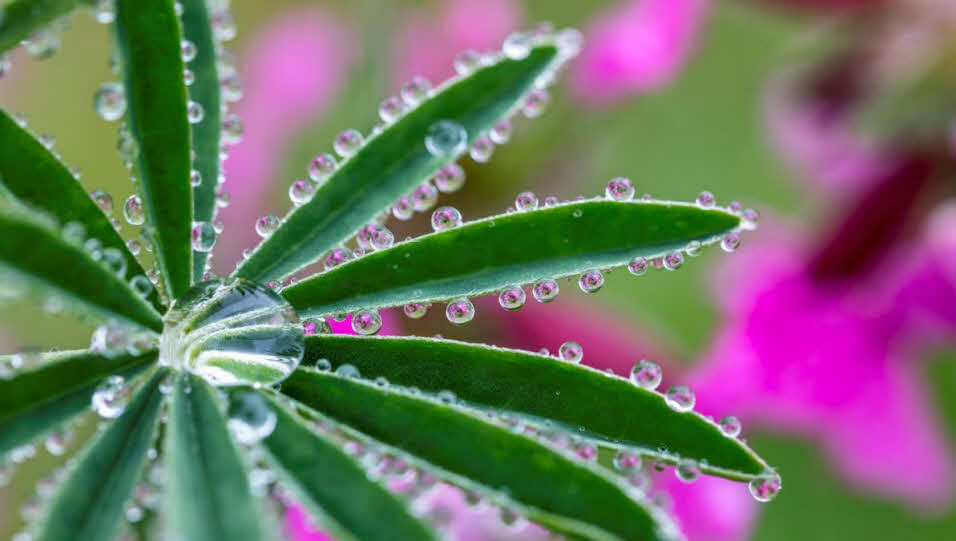 Dew droplets on the leaf of a lupin reveal the red campion beyond © David Chapman
Water is essential to our lives – without it we simply couldn’t exist – but our association with the wet stuff runs deeper than that (please excuse the pun); there is also an emotional connection. When we go out for a picnic or a walk we often head to the coast or sit beside a lake or wander along a river. Plenty of us enjoy boating, surfing or swimming and, throughout the ages, water has been the subject of countless paintings and photographs.
There is a whole host of ways in which we can develop our camera skills to enhance our images of water. Here are a few ideas to whet your appetite.
An idea dawns
It seems logical to start my article at dawn. Yes, I know dawn means early in the day, and you would usually be tucked up in bed, but I beg you to get up and experience it properly – you might find you love it!
For starters, you will be surprised how calm it tends to be at dawn. You’ll find visiting a river or lake when there is no wind to cause a stir in the reflections far more stimulating than your first morning coffee.
Choose a day when there is high pressure and you should get perfect reflections; you might also be blessed with a mist settling above the cold water’s surface. As the sun climbs above the horizon and casts its spell on the landscape, watch how the pastel shades of dawn are transformed by the striking, warm light of day. You will see your familiar surroundings transformed into a wonderland of atmospheric light, mist and sparkling dew drops. Now tell me it wasn’t worth it!
Talking of water droplets, you don’t need to go far to photograph water in one form or another. After a cold, calm night, get out early in your garden and look at the way dew drops rest on your plants. Some leaves are transformed with rows of droplets along their edges, but that’s not all – examine the beads of water closely and you will see the world beyond magically magnified and re-focussed, as though you are staring through tiny windows into Wonderland.
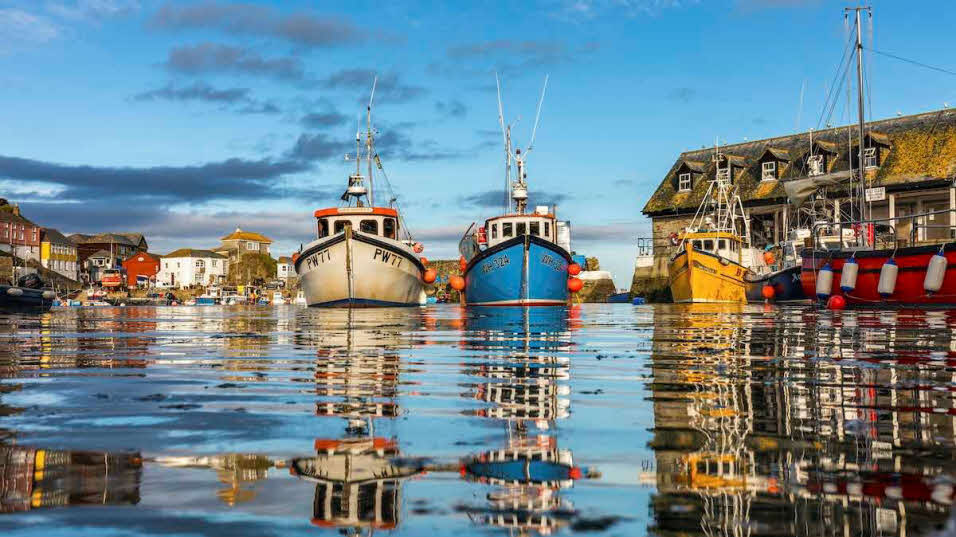 Mevagissey in Cornwall, with the camera low to the water surface © David Chapman
Reflect and compose
Normally, when it comes to composing a photograph we tend to put points of interest off-centre and use the ‘thirds’ rule for the most important focal points and for the horizon. However, I almost always break the ‘rule’ when photographing reflections. Usually the best place for the line of reflection is across the middle of the image, helping to emphasise the symmetry of the picture (there is still scope to put focal points off-centre from left to right).
Rivers can lend themselves very well to composition, their winding shapes naturally leading the eye into the distance. Try placing the foreground part of the river in the bottom-left or right corner of the picture and then putting the disappearing point on the top-right or left third to create a strong diagonal. This diagonal has the effect of guiding the viewer into the picture, but be aware that our eyes are usually drawn to the lightest part of the scene – so try to avoid white patches of water at the edge of the frame. Better to have light patches near the centre or on the thirds so the viewer’s gaze will be drawn into, not out of, your photo.
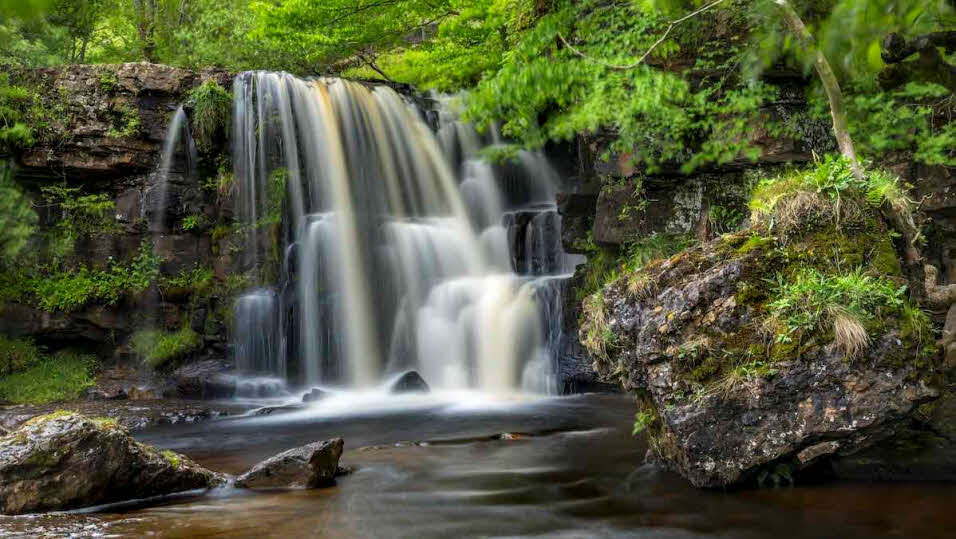 A long exposure creates a silky effect at this waterfall © David Chapman
Take your time
Photography is an art form – so don’t just point and shoot; take your time to consider what impact you can have on the image by adjusting the settings in the camera. One aspect you should consider is shutter speed – that is the length of time that the shutter remains open while taking the photograph. With long exposure times you will see that moving subjects, such as water in a river, waterfall or sea, become blurred, creating a ‘milky’ effect.
I would love to tell you what the best shutter speed is but there is no such a thing – the optimum will vary with the subject. I like a shutter speed that reveals something about the way in which the water is moving, and provides some texture.
In order to achieve long exposure times, you should go out on dull days or at dusk when light levels are low. You’ll also need a tripod and a remote release. I set my camera in aperture priority mode with a low ISO, say 100. Then I choose a small aperture, something like f16 (remember the higher the f-number the smaller the aperture). On a dull day this will give me quite a long exposure time. If I want a faster shutter speed, I will start by widening the aperture and then might choose a higher ISO. You can do this with any camera, except the most basic compacts and phone cameras.
I also have a bag of tricks at my disposal. One particular aid I have in mind is called a neutral density filter. This is a dark piece of glass that fits on the end of the lens, and its effect is to reduce the amount of light coming into the camera, thus increasing exposure time still further. With a couple of different neutral density filters, I have the flexibility to choose from a whole range of possible exposure times to suit the scene.
A water filter
I use one other filter for photographing water, and that’s called a circular polarising filter. It reduces the overall amount of light coming into the camera, so it increases exposure time, but more importantly it takes away some of the reflections from wet surfaces, allowing us to see some detail through the water. For example, in a wooded valley, with a river crashing through, every surface will be damp. The water coating all the leaves on the trees and the moss on the rocks will reflect light, reducing the amount of colour we can see. Put a polarising filter on, rotate the filter to get the desired effect and the increase in colour saturation can be remarkable.
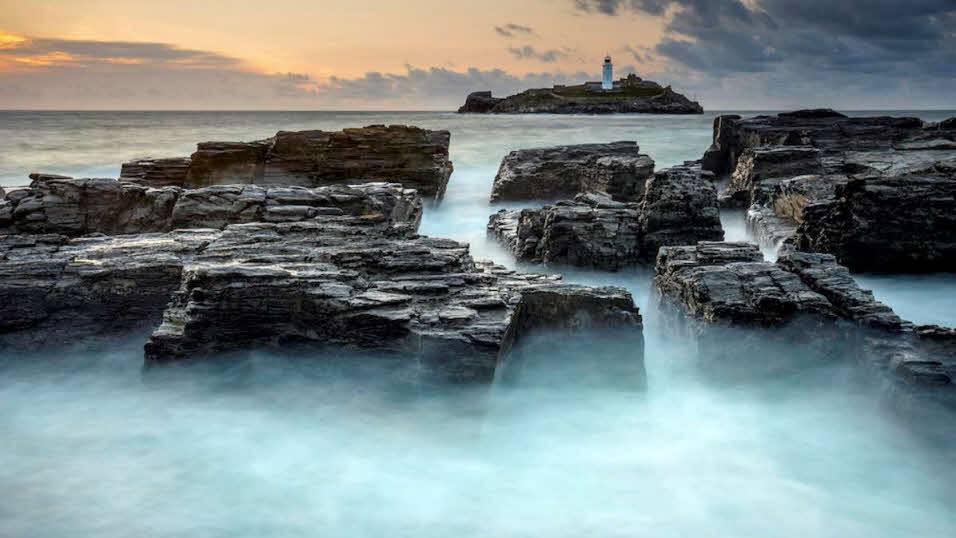 An exposure of 8 seconds leads to an image with magical qualities at Godrevy © David Chapman
Quick tips
1. Get down low when capturing reflections. Hold your camera just above the water’s surface and use ‘live view’ to compose the photo; this often results in a much more engaging image.
2. If you are photographing a scene reflected in the water, but the water is slightly rippled, try
a longer exposure time. You will see that the ripples are smoothed out and reflection improved. I use a neutral density filter for this purpose.
3. If you enjoy playing with long exposures, try making abstract images of leaves floating and swirling in a river current.
4. On a dull day, head to a river in a woodland; if it’s sunny, go somewhere more open such as the coast or a lake.
5. Small, shallow puddles can make great reflections – just get your camera as close as possible to the puddle. I mean really close! Try it, you’ll be surprised.
6. Even on windy days, you can still get great reflections where flat, sandy beaches remain wet as the tide recedes. I have my own favourite at Gwithian near Godrevy in Cornwall.
7. To capture great waves, use a fast shutter speed. Try to visit the sea on a day with an offshore wind which will whip the spray off the top of the waves.
8. Harbours with colourful boats are great for abstract reflections.
About the author